 Save to Pinterest
 I discovered the magic of pickled vegetables during a summer spent at my grandmother's farmhouse, where mason jars lined every shelf like edible jewels. She taught me that the true art wasn't just in the eating, but in transforming a heap of humble garden vegetables into something that tasted like anticipation itself. Years later, when I created this vibrant pickled and fermented feast, I realized I was capturing that same feeling in a platter—each vegetable a small story of patience, tang, and color.
I remember the first time I served this to friends at a summer picnic, arranging the jars in neat rows like a still life painting. One guest asked if it was store-bought because it looked too beautiful to be homemade—that moment, watching their face when they tasted the crisp, alive vegetables, made me understand why people have been pickling for centuries.
Ingredients
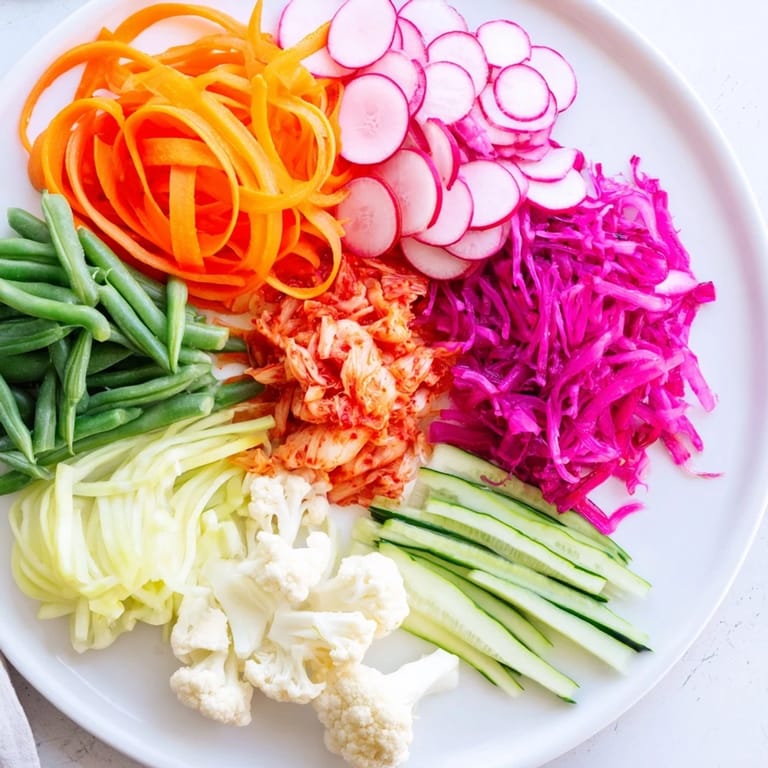
- Carrots, julienned: These ribbon-like strips aren't just for show—they actually pickle faster and let the brine reach every fiber, plus they stay vibrant orange when you use fresh ones.
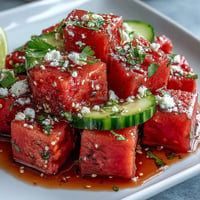
- Cucumber, sliced: Go for firm, smaller cukes if you can; they hold their snap and won't turn to mush like the watery supermarket ones.
- Radishes, thinly sliced: These little spicy wheels are the soul of the platter—they get even peppery-er as they sit, which is exactly what you want.
- Red cabbage, shredded: The color is almost too good to be true, and it only intensifies in the brine, turning everything around it a bit purple.
- Cauliflower florets: Keep them small and tender; they absorb flavor like tiny flavor sponges and stay crisp for days.
- Green beans, trimmed: Blanch them for 2 minutes first if you like—it keeps the color bright and gives them a subtle cook without losing that fresh snap.
- White vinegar: This is your flavor backbone; it's clean and sharp without competing with the vegetables.
- Water: Use filtered if you have it, just to keep things pure and clear.
- Sugar: A small amount softens the vinegar's bite and lets the vegetables' natural sweetness come through.
- Kosher salt: This matters more than you'd think; table salt can make things cloudy, and sea salt is too unpredictable.
- Garlic, sliced: Thin slices infuse faster than whole cloves and distribute flavor evenly through the jar.
- Mustard seeds: They pop slightly when you bite down, adding texture and a warm, toasty note that feels almost grounding.
- Coriander seeds: Toast them lightly in a dry pan first if you want their flavor to really sing—it's a small step that changes everything.
- Black peppercorns: Don't skip these; they add a subtle heat that arrives just as the tang fades.
- Bay leaves: These are your gentle hand on the tiller, keeping the whole thing feeling balanced and not too sharp.
- Fresh dill: The herb everyone forgets they love until they taste it in pickles; it brings an almost botanical freshness.
- Red chili, sliced: This is optional but recommended—it adds not just heat but a fruity complexity that lives underneath the other flavors.
- Kimchi: If you're adding the fermented option, choose one that speaks to you; some are funkier, some are spicier, all are magic.
- Sauerkraut: Again, let your taste lead you—live fermented versions offer a different experience than shelf-stable ones.
Tired of Takeout? 🥡
Get 10 meals you can make faster than delivery arrives. Seriously.
One email. No spam. Unsubscribe anytime.
Instructions
- Wash and Prepare Your Canvas:
- Start by washing all your vegetables under cool running water, then slice and julienne them as indicated. This is where your knife skills shine—aim for even pieces so they pickle at the same rate. Some pieces will soften faster than others, and that's the beauty of variety, but thin, uniform cuts help everything play fair.
- Build Your Brine with Purpose:
- In a saucepan, combine the vinegar, water, sugar, and salt over medium heat. Stir occasionally, watching the sugar and salt dissolve into the liquid—this takes about 3 minutes and you'll know it's ready when there's no grit at the bottom of the pan. The brine should smell bright and clean, almost tangy enough to make your eyes water just a little. Remove from heat and let it cool for about 5 minutes; you want it warm enough to invite flavors in, but not so hot it turns your vegetables mushy.
- Pack Your Jars Like a Jeweler:
- Get out your clean glass jars—the same ones you've been hoarding work beautifully here—and start layering. Group vegetables by color and shape: carrots in one section, then radishes, then cauliflower, then green beans. This isn't just for Instagram; grouped vegetables actually pickle more evenly because the brine moves similarly through similar textures. Pack them snugly but not violently; you're creating a neighborhood, not a traffic jam.
- Scatter the Aromatics Like Secrets:
- Distribute garlic slices, mustard seeds, coriander seeds, peppercorns, bay leaves, dill sprigs, and chili slices evenly among your jars. A little trick: drop them in as you layer vegetables so they nestle into nooks and distribute flavor in every direction. This is your chance to smell your future dinner—take a moment to appreciate it.
- Pour and Submerge:
- Pour the still-warm brine over everything slowly and carefully, making sure every vegetable gets covered. Any vegetable that pokes above the brine will go soft and brown instead of snappy and bright, so push things down gently if they float. You should hear a little sizzle as the warm brine meets the cool vegetables—that's the pickling beginning right before your eyes.
- Seal and Be Patient:
- Seal your jars and let them cool completely to room temperature on the counter—this usually takes 2 hours. Then transfer to the refrigerator. This is the hardest part: waiting. Quick pickles need at least 12 hours to develop character, but 24 hours is when they sing, and 48 hours is when they become something you'll dream about.
- The Fermentation Alternative (If You're Feeling Adventurous):
- If you want true fermentation instead of quick pickles, prepare fresh vegetables with a 2% salt brine (20 grams salt per 1 liter water) and leave them at room temperature, loosely covered with cheesecloth or an airlock lid. Check on them daily—you'll see bubbles rising, smell funkiness developing, and taste the transformation happening in real time. After 5 to 7 days, when you like how they taste, move them to the refrigerator where they'll slow their fermentation and stabilize.
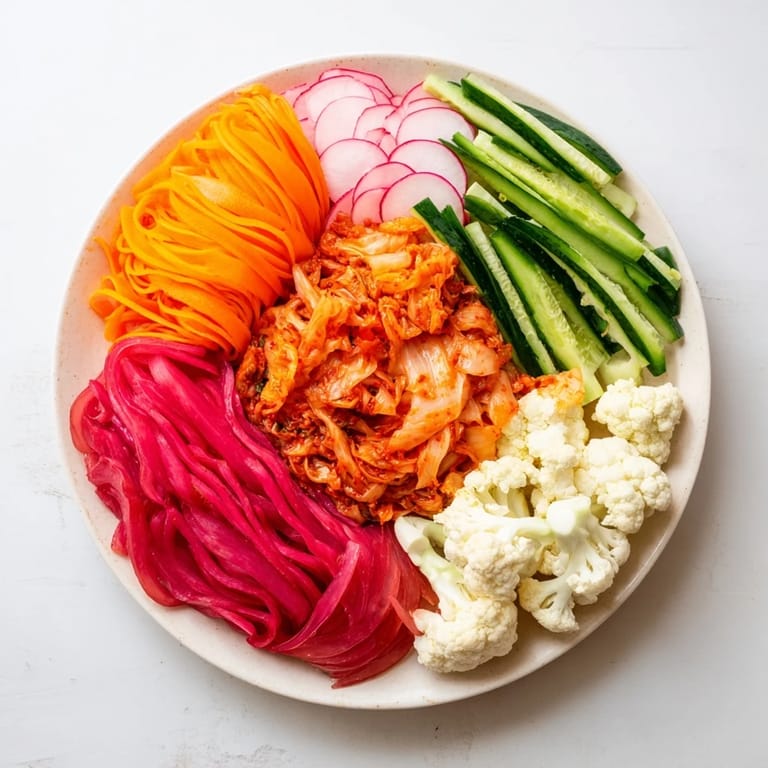
- Arrange and Present Like You Made Them Yesterday:
- When you're ready to serve, arrange your pickled and fermented vegetables in small jars, bowls, or on a board in linear or grid patterns. The colors should be intentional, almost architectural. Pour a little brine into bowls to catch the vegetables, and let people see what you've created. This moment, watching people reach for something you made, is worth every minute of waiting.
 Save to Pinterest
 There's a moment, around day three of refrigeration, when you open the jar just to peek and end up eating three straight pieces while standing at your open fridge, unable to stop. That's when you know you've made something worthwhile.
The Visual Magic of Arrangement
One thing I learned while plating these is that the arrangement is half the recipe. When you take time to group colors and shapes intentionally—purples next to oranges, whites next to reds—you're not being pretentious, you're honoring the vegetables and giving people permission to enjoy them with their eyes first. A boring platter of mixed pickles tastes less interesting than the exact same pickles arranged thoughtfully. It sounds silly, but presentation actually affects taste, because it affects expectation, which affects how your brain receives flavor. This is why farmers markets feel different from supermarkets, and why your grandmother's kitchen always smelled better than anywhere else.
The Science Behind the Crunch
What keeps pickled vegetables crisp while everything else softens is the calcium in the vegetables themselves, which firms up when acid reaches it. This is why soaking cucumbers in ice water before pickling, or adding a grape leaf or oak leaf to the brine (old-timers' tricks), actually works—the tannins help lock in texture. You can also blanch harder vegetables for just a minute or two before pickling if you want to preserve a vegetable's character while softening it slightly. Understanding these small mechanisms transforms you from someone following a recipe to someone who understands how food works, and that's when cooking becomes less like following instructions and more like having a conversation with your ingredients.
Why This Feast Became My Signature
Somewhere between my fifth batch and my twentieth, I realized this platter had become more than a recipe—it was a edible mood, a conversation starter, a way of saying to friends and family that I'd spent time thinking about their enjoyment. Every jar tastes slightly different based on the vegetables I could find, the vinegar I chose, how long I let it sit. It's infinitely customizable, which means it's deeply personal.
- If you have beets, radishes, or turnips in season, they pickle beautifully and make the brine turn an impossible pink.
- Apple cider vinegar or rice vinegar create completely different flavor profiles—try them one at a time and find your preference.
- A strip of lemon zest or orange zest added to the jar adds brightness that lingers on your palate in the best way.
 Save to Pinterest
 These pickles keep in the refrigerator for up to three months, though they rarely last that long. Serve them alongside crusty bread and cured meats, or scatter them on a cheese board, or eat them straight from the jar while cooking dinner. They're the kind of thing that makes every moment feel a little more intentional, a little more delicious.