 Save to Pinterest
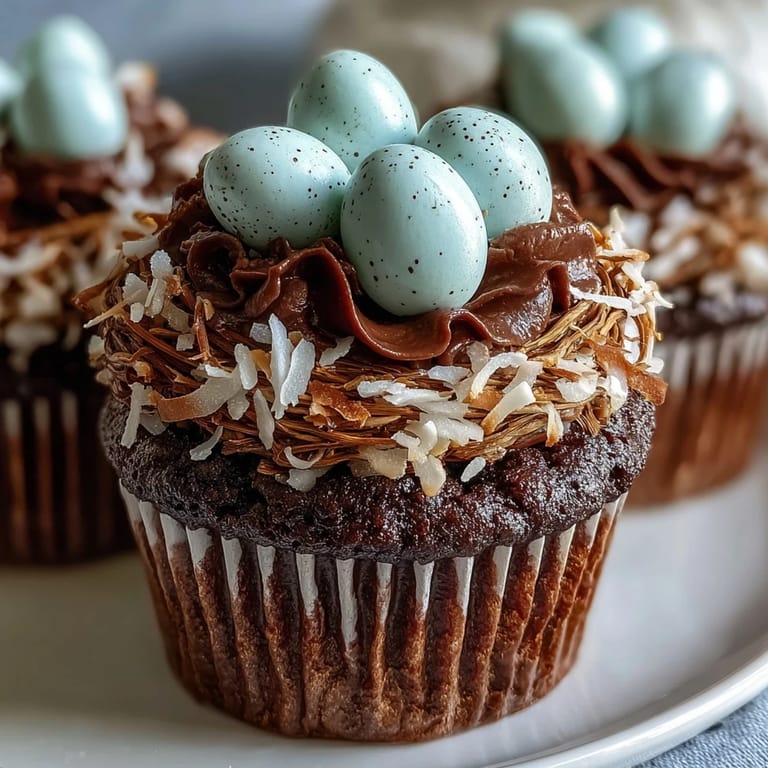
 The first time I thought to turn cupcakes into tiny bird nests was after spotting a bag of pastel candy eggs at the market, their glossy surfaces begging for a decadent home. The idea lingered until a rainy spring afternoon when trying to cheer up restless kids after a sugar-fueled Easter egg hunt. The scent of chocolate cupcakes mingled with giggles as eager little hands fought for their turn to decorate. It became less about perfection and more about the joyful, slightly messy creativity that filled the kitchen. There is something about these cupcakes that makes even the most ordinary afternoon feel a bit enchanted.
I once made these for a last-minute neighborhood Easter brunch, and to my surprise, even the adults hovered around the cupcake stand for seconds and thirds. We ended up sharing tips and little stories around the table, each person picking their favorite candy egg color from the nests. The cupcakes disappeared in a record ten minutes, and even the shyest guest left with chocolate on their chin. That was the moment I realized how much delight one playful dessert could bring. Now I stash extra candy eggs, just in case.
Ingredients
- All-purpose flour: I’ve learned sifting it first keeps the cupcakes extra tender.
- Unsweetened cocoa powder: Deepens the chocolate flavor and gives richer color; Dutch-processed works beautifully here.
- Granulated sugar: Balances bitter cocoa and ensures a moist crumb.
- Baking powder & baking soda: The combination guarantees a tall, fluffy rise that never lets me down.
- Salt: Just a pinch wakes up all the other flavors.
- Large eggs: Let them come to room temperature for the smoothest batter.
- Whole milk: Adds richness; I once tried with almond milk in a pinch and it worked fine.
- Vegetable oil: Stays moist for days—don’t swap for butter here.
- Vanilla extract: Use real extract for warmth and depth.
- Hot water: Makes the batter thin but results in cupcakes with a delicate crumb.
- Unsalted butter: For the buttercream, softening is a must or you’ll battle lumps (I set it out before anything else).
- Powdered sugar: Sifts easily and integrates fast, so the frosting stays fluffy not gritty.
- Milk: A splash at a time loosens the buttercream to pipeable perfection.
- Candy-coated mini eggs: These steal the show visually and for little hands, choosing which one to eat is half the fun.
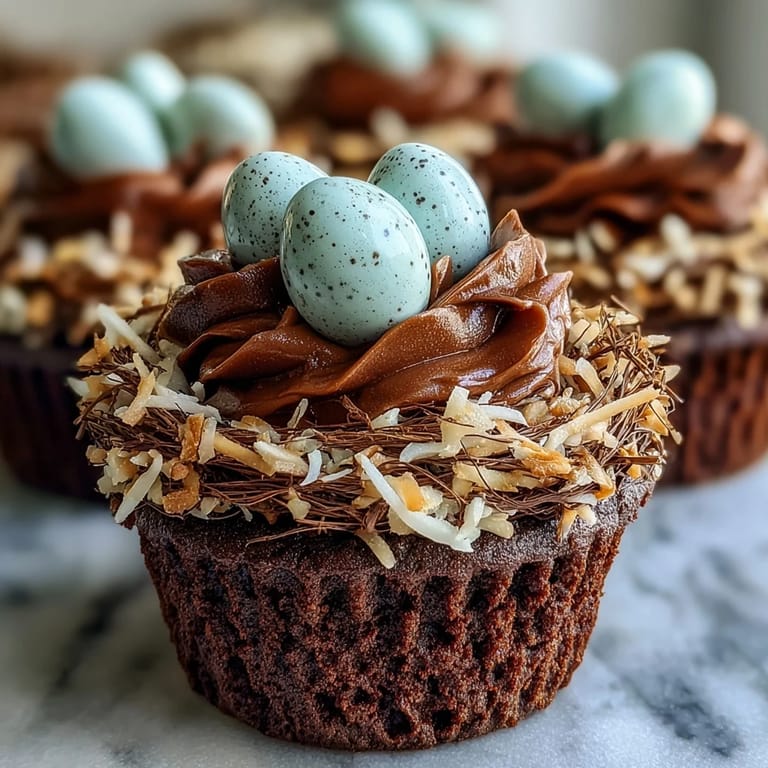
- Shredded coconut or chocolate sprinkles: Toasting coconut first gives a subtle crunch and irresistible aroma.
Tired of Takeout? 🥡
Get 10 meals you can make faster than delivery arrives. Seriously.
One email. No spam. Unsubscribe anytime.
Instructions
- Prepare your oven and pans:
- Heat the oven to 350°F (175°C) and line a muffin tin with cupcake liners, listening for the gentle rustle as each one drops into place.
- Mix the dry ingredients:
- In a large bowl, whisk flour, cocoa, sugar, baking powder, baking soda, and salt until you see no more streaks; the aroma will already nudge you toward chocolate cake dreams.
- Combine wet ingredients:
- In a second bowl, beat eggs with milk, oil, and vanilla until the mixture is glossy and uniform.
- Make the batter:
- Pour the wet mixture into the dry bowl and, using a spatula, gently blend just until combined—resist overmixing. Stir in the hot water; the batter will look runny, but trust me, that’s your ticket to ultra-moist cupcakes.
- Fill and bake:
- Divide your batter evenly among the liners, about two-thirds full. Slide the tin into the oven and bake for 18–20 minutes, rotating halfway, until a toothpick comes out clean and tops bounce lightly to the touch.
- Cool completely:
- Let cupcakes cool in the tin for five minutes, then transfer to a wire rack and let them cool completely to avoid a melting buttercream disaster.
- Make the buttercream:
- In a bowl, beat softened butter with powdered sugar, cocoa, milk, vanilla, and a pinch of salt until deeply chocolatey, fluffy, and irresistible—you’ll know it’s ready when it forms soft peaks on the beaters.
- Decorate the nests:
- Pipe or spread the buttercream onto cooled cupcakes, swirling in circles to build up nest walls. Optional: Sprinkle toasted coconut or chocolate sprinkles around the edge for that playful, rustic look.
- Finish with candy eggs:
- Carefully press two or three candy eggs into the center of each nest—this part always inspires delight in all ages.
 Save to Pinterest
 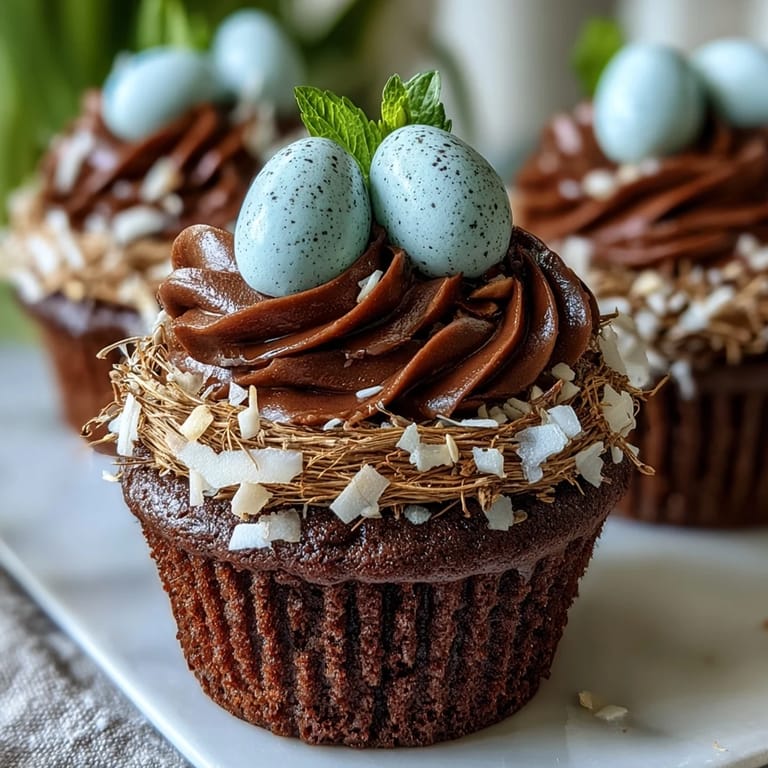 Save to Pinterest
 One quiet evening, my youngest insisted we make the nests after everyone else went to bed. We whispered as we worked, lighting the kitchen by stove-top glow, and the sense of secret mischief made our midnight treats taste even sweeter. When we snuck them onto the breakfast table the next morning, it felt like leaving a treasure map for everyone else to discover. Suddenly, those cupcakes symbolized sneaky adventures as much as a good dessert. I always smile remembering that hush.
Choosing Your Nest Toppers
I’ve experimented with every candy egg brand under the sun and even swapped in jelly beans when someone’s sweet tooth demanded it. Sometimes we skip coconut entirely and pack the nests with chocolate sprinkles—no one complains. The important part is making the nests your own, even if that means rainbow eggs or a lone marshmallow chick perched on top. It’s the kind of decorating where kids’ ideas are usually the best ones. And honestly, the tiniest eggs always seem to disappear first.
Easy Egg-free or Gluten-free Tweaks
This recipe adapts beautifully if you’re working around dietary needs; I’ve swapped in 1:1 gluten-free flour and the cupcakes still rise and fluff just right. For egg-free, a tablespoon of applesauce per egg kept the crumb soft and bound the batter well during one impromptu vegan bake. Testers gobbled them up without even realizing the swap. Just watch your candy egg packaging—ingredients vary by brand. Sometimes adapting a tradition makes it even more special for everyone at the table.
Troubleshooting Tricky Moments
If your first swirl of buttercream turns soupy or the cupcakes sink, don’t panic—pastry bags can be forgiving, and a few artful sprinkles hide almost anything. Cupcakes can be baked a day ahead and topped just before serving, which is my move for busy weekend mornings. Never underestimate the power of a generous dusting of cocoa if chocolate sprinkles aren’t handy.
- Make sure cupcakes are completely cool before decorating.
- Use a sturdy piping bag or a zip-top bag with the corner snipped off for quick nests.
- Don’t be afraid to get delightfully messy—these treats are all about fun.
 Save to Pinterest
  Save to Pinterest
 You’ll have more fun making these than you expect, and even more watching friends and family light up at the finished nests. They might just become a new spring tradition for your kitchen too.
Ask About This Recipe
- → How do I create the nest shape with buttercream?
Use a piping bag fitted with a round or open star tip. Start in the center and pipe a small mound, then circle outward and back inward to form a shallow well for the eggs. Adjust pressure for thinner or thicker "twigs."
- → Can I toast the shredded coconut for better flavor?
Yes. Spread coconut on a baking sheet and toast at 350°F (175°C) for 4–6 minutes, stirring once, until golden. Watch closely as it browns quickly. Toasted coconut adds crunch and a nutty aroma to the nest texture.
- → What does the hot water do in the batter?
Hot water blooms the cocoa, intensifying chocolate flavor and producing a thinner batter that yields a tender crumb and moist cupcakes after baking.
- → How should I store finished cupcakes?
Store in an airtight container at room temperature for up to 2 days, or refrigerate up to 4 days. Bring to room temperature before serving; if refrigerated, the coconut may lose some crispness.
- → Are there good substitutions for vegetable oil?
You can use equal amounts of melted butter or neutral oil like canola. For slightly lighter texture, substitute half the oil with applesauce, keeping overall liquid balance in mind.
- → How can I make these gluten-free?
Swap the all-purpose flour for a 1:1 gluten-free baking blend and ensure the blend contains xanthan gum or add 1/4 tsp per cup if needed. Check all other packaged ingredients for gluten-free labeling.