 Save to Pinterest
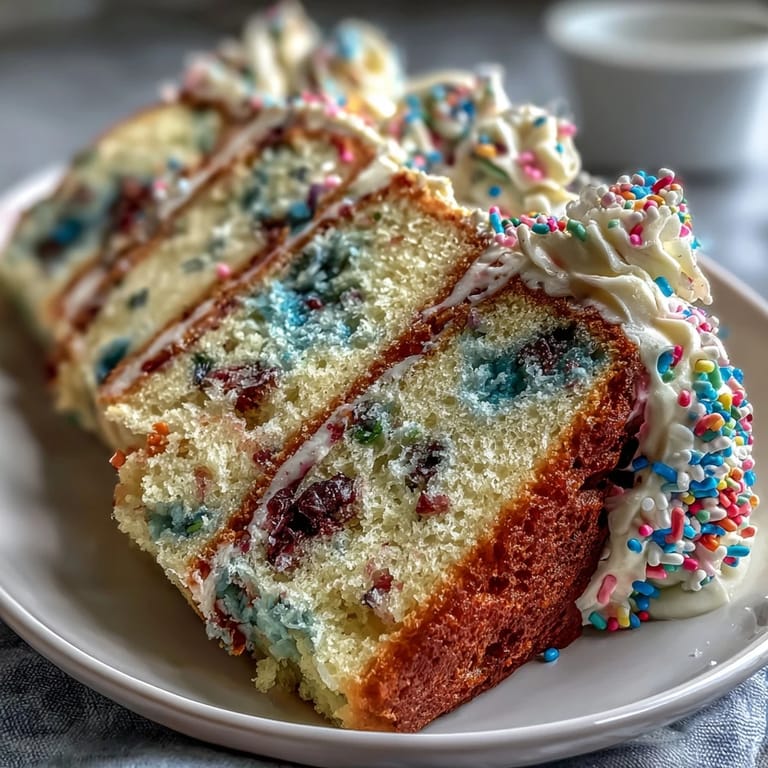
 My neighbor showed up at my door one April afternoon with a box of pastel-colored sprinkles she'd impulse-bought, asking if I could turn them into something special for her daughter's birthday party. I'd never made a funfetti cake before, but there was something about those soft pinks and blues that felt like spring itself sitting on my counter. That afternoon, my kitchen filled with the warm vanilla smell of cake baking while we chatted about how a simple box of sprinkles could spark the kind of joy kids remember for years.
What I didn't expect was how the birthday girl would come back weeks later to ask me to teach her how to make it herself. We spent an afternoon in my kitchen with her apron dusted in flour, and she kept stopping to admire how the sprinkles looked swirled into the batter. That's when I realized this wasn't just a recipe—it was the kind of thing that gets passed along, that becomes a memory someone returns to.
Ingredients
- All-purpose flour (2 1/2 cups): This is your cake's backbone, and measuring it correctly makes the difference between something tender and something dense—spoon and level rather than scooping straight into the bag.
- Baking powder and baking soda (2 1/2 tsp and 1/2 tsp): They work together to give the cake that light, bouncy crumb that makes every bite feel like springtime.
- Unsalted butter (1 cup for cake, 1 1/2 cups for frosting): Room temperature is non-negotiable here—cold butter won't cream properly, and you'll end up with a dense cake instead of the cloud you're aiming for.
- Granulated sugar (1 1/2 cups): This feeds your butter into a fluffy base, so don't skip the creaming step or rush it.
- Eggs (4 large, room temperature): Cold eggs will seize up in your warm batter and create lumps, so pull them out of the fridge while your oven preheats.
- Pure vanilla extract (2 tsp for cake, 2 tsp for frosting): The real stuff makes a difference you can actually taste—don't cheap out on this one.
- Whole milk and sour cream (1 cup milk, 1/2 cup sour cream): The sour cream adds moisture and tang that keeps the cake tender for days, and room temperature matters here too.
- Rainbow sprinkles (2/3 cup jimmies): Use jimmies, not nonpareils—they integrate better into the batter and won't bleed their color everywhere, which I learned the hard way on my first attempt.
- Powdered sugar (5 cups, sifted): Sifting isn't just fancy talk; it prevents lumps and gives your buttercream that silky finish.
- Food coloring gels in pastel shades: Gel colors are more concentrated than liquid, so a tiny dab actually colors your frosting without making it watery like food coloring would.
Tired of Takeout? 🥡
Get 10 meals you can make faster than delivery arrives. Seriously.
One email. No spam. Unsubscribe anytime.
Instructions
- Set the stage:
- Preheat your oven to 350°F and line two 9-inch round pans with parchment paper—it's the difference between a cake that releases beautifully and one that sticks stubbornly. Greasing the pans first helps the parchment stay put.
- Build the dry team:
- Whisk your flour, baking powder, baking soda, and salt in a medium bowl so they're evenly distributed. This is where leavening gets mixed in uniformly, giving you an even rise.
- Cream the butter and sugar:
- Beat them together for a full 3 minutes until it's pale and fluffy—this aerates the batter and creates a tender crumb. You'll know it's ready when it looks almost like frosting.
- Introduce the eggs slowly:
- Add them one at a time, beating well after each addition so they emulsify into the batter instead of sitting as little pools. Then mix in vanilla.
- Combine the liquids:
- Whisk milk and sour cream together in a separate bowl—this prevents lumps from the sour cream and helps everything incorporate smoothly.
- Alternate and fold:
- Add the dry mixture and milk mixture in three parts, starting and ending with flour, stirring just until combined. Overmixing activates the gluten and makes the cake tough, so stop as soon as you don't see dry streaks.
- Fold in the color:
- Use a rubber spatula to gently fold in the sprinkles at the very end so you don't crush them and lose those little pops of color. Some will still sink slightly, but that's okay—it looks magical.
- Bake and watch:
- Divide batter evenly and smooth the tops, then bake 28-32 minutes until a toothpick comes out clean. Every oven is a little different, so start checking around the 25-minute mark.
- Cool with patience:
- Let the cakes rest in their pans for 10 minutes before turning them out onto a wire rack—this prevents them from cracking from the sudden temperature change. Cool completely before frosting or they'll slide apart.
- Make the buttercream magic:
- Beat the butter smooth and creamy, then gradually add sifted powdered sugar on low speed so it doesn't cloud your kitchen. Once combined, add milk, vanilla, and salt, then beat on high until it's fluffy enough to hold soft peaks.
- Paint with pastels:
- Divide buttercream into four bowls and tint each with just a tiny dab of gel color—you can always add more, but you can't take it out. The beauty is in the softness, not the intensity.
- Decorate with intention:
- Dollop or pipe each color onto the cooled layers, then swirl them together with a knife or offset spatula for that dreamy marbled effect. There's no wrong way to do this part—it's all personal expression.
 Save to Pinterest
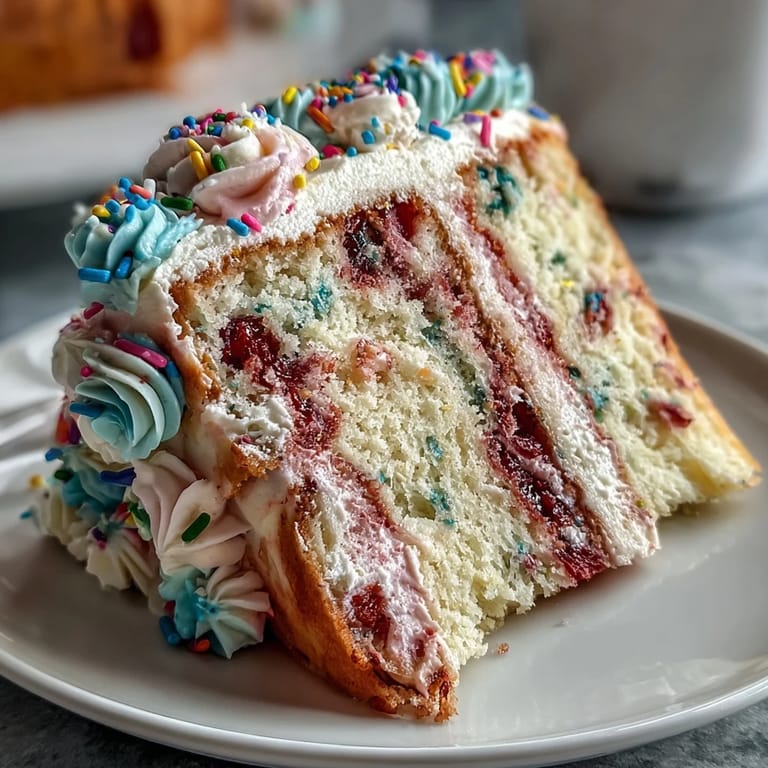
 I think what stays with me most is watching someone's face light up when they take the first bite and find sprinkles inside the cake, not just on top. That little surprise, that moment where the cake is prettier than they expected and tastes like joy—that's what this recipe does.
The Secret to a Tender Crumb
The sour cream is doing more work than you might think. It's not just there for flavor; it adds moisture and acidity that keeps the cake impossibly tender even on day two. I learned this when I tried making the cake with extra milk instead and ended up with something that felt slightly dry by the next afternoon.
Sprinkles and the Art of Prevention
Jimmies stay intact much better than nonpareils because they're sturdier. I made the mistake of using nonpareils once, and they practically dissolved into the batter, turning the whole thing a muddy color instead of the cheerful speckled effect I was going for. Jimmy sprinkles are also less likely to bleed during baking, which means your white cake stays white instead of becoming tie-dyed.
Frosting Tinting Without the Mess
Gel food coloring is your friend here because a tiny amount goes a long way, and you won't end up with buttercream that's too thin or too sweet. I've made this mistake with liquid food coloring and watched the frosting go watery as I added enough color to make a difference. Start with just a toothpick dab, mix it in, and then decide if you need more—that approach gives you beautiful pastels every time.
- Keep a clean toothpick handy for each color so you're not mixing them before they're supposed to meet.
- If you go too dark, blend that bowl of frosting with a fresh batch of uncolored buttercream to tone it down.
- Let the frosting sit for a few minutes after tinting so the color fully develops before you decide it needs to be darker.
 Save to Pinterest
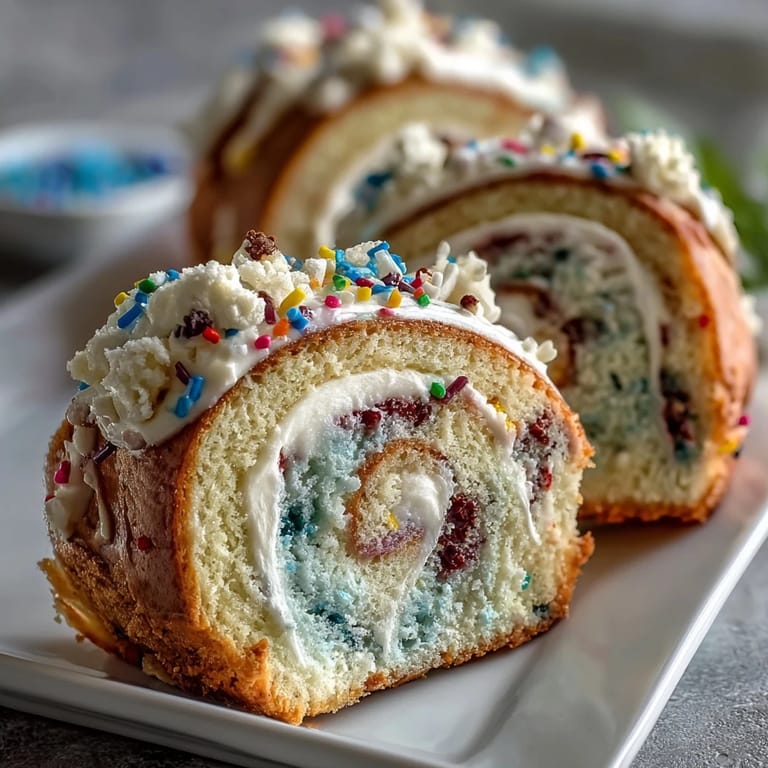
 This cake is the kind of thing that tastes like celebration itself, and that's the whole point. Bake it, decorate it however feels right in that moment, and watch someone's eyes light up when they see it on the table.
Ask About This Recipe
- → How do I avoid sprinkles bleeding color?
Use high-quality jimmie sprinkles rather than nonpareils, as they hold their color better and prevent bleeding.
- → Can I substitute Greek yogurt for sour cream?
Yes, Greek yogurt can be used as a substitute for sour cream to maintain moisture and tenderness in the cake.
- → What is the best way to achieve pastel buttercream colors?
Divide the frosting into separate bowls and add small amounts of food gel coloring to each for soft pastel shades, then mix gently.
- → How do I know when the cake is fully baked?
Insert a toothpick into the center; if it comes out clean or with a few crumbs, the cake is done baking.
- → Can this be made as cupcakes?
Yes, bake in cupcakes for 22–24 minutes, adjusting the time accordingly for smaller portions.