 Save to Pinterest
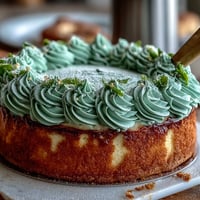
 My friend texted me a photo of a sunset one April afternoon—streaks of pink melting into golden yellow—and I couldn't stop staring at it. That's when I knew I had to bake something that captured that exact feeling, something soft and layered and impossibly pretty. The Spring Ombre Cake became my answer, a way to turn color into something you could actually taste. I've made it three times now, and each time someone cuts into those pastel layers, there's this moment of genuine delight that reminds me why I love baking in the first place.
I baked this cake for my cousin's bridal shower, and I remember my hands shaking a little as I was blending that buttercream from yellow to pink. There were so many people watching from the kitchen doorway, and when I finished smoothing the last bit of frosting and turned it around to reveal the full gradient, the whole room actually gasped. That moment made me realize this cake wasn't just beautiful—it had this ability to make people feel something, to celebrate in a way that mattered.
Ingredients
- All-purpose flour (3 cups): The foundation of your cake, so make sure it's fresh and properly measured by weight if possible, as it makes a real difference in how tender the final crumb turns out.
- Baking powder (2 ½ tsp): This gives you that delicate, cloud-like rise—don't skip it or your layers will feel dense instead of light.
- Salt (½ tsp): Just a whisper of it, but it awakens all the sweet flavors and keeps the cake from tasting one-dimensional.
- Unsalted butter, room temperature (1 cup for batter, 1 ½ cups for frosting): Room temperature is non-negotiable here; cold butter won't incorporate properly and you'll end up with a grainy crumb.
- Granulated sugar (2 cups): This creams with your butter to trap tiny air bubbles, which is what makes the cake so beautifully fluffy.
- Large eggs, room temperature (4): Cold eggs will seize the batter, so pull them out of the fridge about an hour before you start, or dunk them in warm water for a few minutes.
- Pure vanilla extract (1 tbsp for cake, 2 tsp for frosting): Use real vanilla, never the imitation stuff—your taste buds will know the difference instantly.
- Whole milk, room temperature (1 cup): The temperature matters because it prevents the butter from getting shocked and breaking down; alternating it with flour keeps everything silky.
- Pink and yellow gel food coloring: Gel coloring is much stronger than liquid, so you'll use less and won't thin out your batter, which means your cake stays tender.
- Powdered sugar, sifted (5 cups): Sifting removes lumps and makes your frosting impossibly smooth and dreamy to spread.
- Heavy cream or milk for frosting (3–4 tbsp): This adjusts the consistency; add it slowly and taste as you go because you can always add more but you can't take it back.
Tired of Takeout? 🥡
Get 10 meals you can make faster than delivery arrives. Seriously.
One email. No spam. Unsubscribe anytime.
Instructions
- Get your mise en place ready:
- Preheat your oven to 350°F and take a minute to grease and line three 8-inch cake pans with parchment paper, pressing it gently into the corners. This step feels tedious but it's the difference between cakes that slide out perfectly and ones that stick and crumble.
- Mix your dry ingredients:
- In a medium bowl, whisk together the flour, baking powder, and salt, making sure there are no hidden pockets of baking powder that could create a bitter spot in your cake. This takes less than a minute but it distributes the leavening evenly.
- Cream the butter and sugar:
- Beat them together for about 3 to 4 minutes on medium speed until the mixture is pale, fluffy, and nearly doubled in volume; you should see it transform from dense and grainy to light and cloud-like. Listen to the mixer—when it sounds lighter and airier, you know you're ready to move on.
- Add your eggs, one at a time:
- This is where patience matters; after each egg goes in, let the mixer run for about 30 seconds before adding the next one, and you'll notice the batter getting richer and smoother. If you rush this step and add all the eggs at once, the batter might look separated and weird, which usually means the temperature of your eggs wasn't quite right.
- Mix in the vanilla and alternate your wet and dry ingredients:
- Start with flour, then milk, then flour again, ending with flour, and mix just until you don't see streaks anymore. Overmixing develops gluten and makes your cake dense, so resist the urge to beat it until it's perfectly smooth.
- Divide and color your batters:
- Split the batter into three bowls and add just a tiny bit of pink gel coloring to one and yellow to another, stirring gently until the colors are even. The key here is restraint—those pale, whisper-soft pastels are what make the ombre effect feel sophisticated instead of loud.
- Bake your layers:
- Pour each batter into its prepared pan and smooth the tops slightly, then slide them all into the oven and set a timer for 22 to 26 minutes. A toothpick inserted into the center should come out clean with maybe just a crumb or two clinging to it.
- Cool with intention:
- Let them rest in their pans for 10 minutes—this allows them to set up slightly so they won't tear when you turn them out onto wire racks. Then let them cool completely at room temperature, which takes about an hour; this is when you can take a break, sip some tea, and mentally prepare for the frosting and assembly.
- Make your buttercream frosting:
- Beat the room-temperature butter until it's creamy and pale, then gradually add your sifted powdered sugar along with the vanilla and salt, beating until fluffy and light. Add the milk or cream slowly, tasting as you go, because you want it spreadable but still sturdy enough to hold those sharp ombre edges.
- Color your frosting:
- Divide the frosting into three bowls and tint them with the same pale pink, pale yellow, and leave one plain; the colors should echo the cake layers underneath. Stir each bowl gently so you don't deflate all that beautiful fluffiness you just created.
- Level and assemble:
- If your cake layers have domed on top, use a cake leveler or a serrated knife to trim them flat so they stack evenly. Place the yellow layer on your serving plate, spread it with yellow buttercream, top with your middle layer, frost with plain buttercream, then crown it with the pink layer and frost that with pink buttercream.
- Create that ombre magic:
- Using an offset spatula or cake scraper, spread the remaining frosting around the sides, starting with yellow at the base and blending upward to pink at the top, letting the colors blend naturally as you smooth. This is where you can be artistic—the blend doesn't have to be perfect, and honestly, the more organic it looks, the better.
- Decorate and chill:
- Add pastel sprinkles, edible flowers, or whatever feels right to finish your masterpiece, then refrigerate the whole cake for at least 30 minutes so the crumb stays clean when you slice into it.
 Save to Pinterest
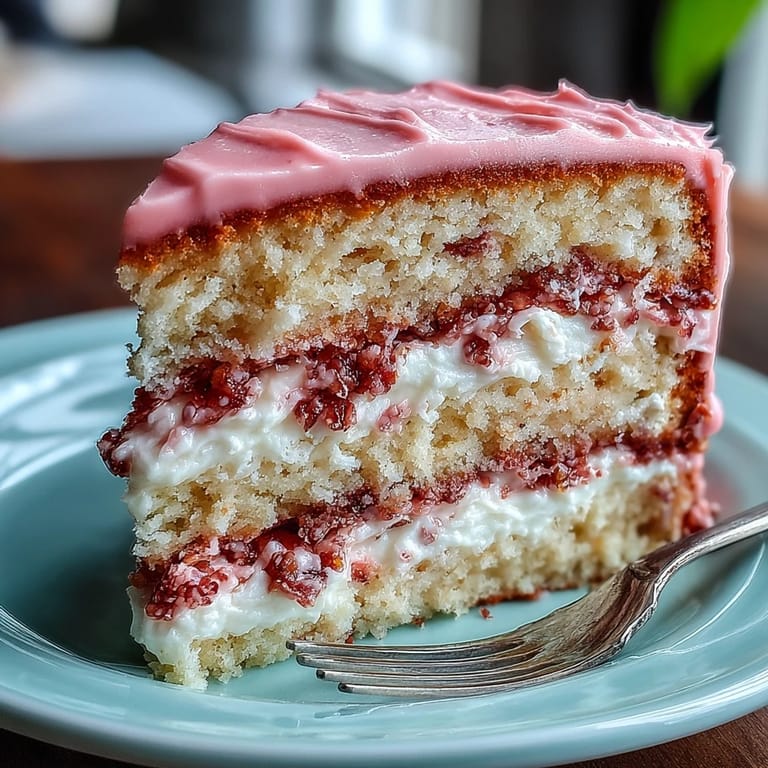
 What really struck me about this cake wasn't just how it looked, but how it made people slow down and really look at their dessert before diving in. At the bridal shower, my cousin held her slice up to the light and the colors glowed like stained glass, and I realized that sometimes the most meaningful part of cooking isn't the taste—it's the story the food tells and the moment it creates.
The Art of the Ombre
The ombre gradient is the showstopper here, but here's the truth: it doesn't need to be flawless to look incredible. I learned this the hard way when I was trying to create a perfectly even blend on my first attempt, stressing over every stroke until my partner pointed out that the slight variations in color actually made it look more organic and hand-crafted. The best approach is to work in sections—frost a third of the cake at a time, blending where the colors meet, and remember that a cake scraper is your best friend for getting those smooth, clean lines. If you don't have one, the back of a spoon dipped in hot water works surprisingly well, and the warmth actually helps the frosting blend more easily.
Timing and Temperature Matters
There's a rhythm to this cake that you want to respect, especially if you're making it ahead for an event. Baking and cooling takes about two hours total, then you can store the unfrosted layers at room temperature in an airtight container for a day, or wrap them well and freeze them for up to a week. I usually frost and assemble the cake on the day I'm serving it because the frosting stays softer and more spreadable, and honestly, there's something nice about that frantic energy in the kitchen a few hours before people arrive. If you do need to make it further ahead, frost and decorate it, then refrigerate for up to four days—just let it sit at room temperature for about 30 minutes before slicing so the crumb isn't too firm.
Flavor Pairings and Serving Suggestions
This cake is delicate and not overly sweet, which means it plays beautifully with other flavors rather than fighting for attention. I've served it alongside fresh berries, a dollop of whipped cream, or even a drizzle of honey, and each of those elevates it in different ways. The pale vanilla cake and silky buttercream also pair wonderfully with sparkling lemonade, a crisp Moscato, or even a light fruit punch—anything that feels refreshing and celebratory without being heavy. If you want to add a subtle flavor shift, you could infuse the milk with a tiny bit of almond or lemon zest before mixing it into the batter, or swap a tablespoon of the vanilla for rose or lavender extract for an even more spring-like feel.
- Serve with edible flowers like pansies or violas for a garden-fresh look that feels completely effortless.
- A light dusting of pearl luster dust instead of sprinkles gives it a more elegant, grown-up vibe if you're decorating for a sophisticated crowd.
- Remember that this cake is forgiving with decoration—lean into your own style rather than trying to replicate magazine-perfect designs.
 Save to Pinterest
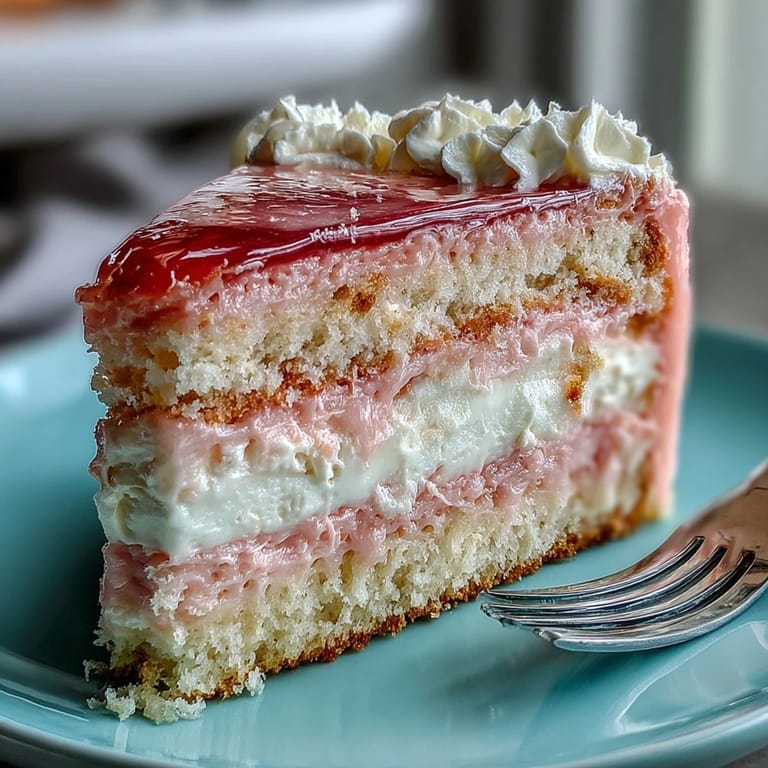
 This cake has become my go-to whenever I want to create something that feels special without being fussy, and I hope it becomes one of yours too. There's real joy in pulling a gradient cake out of the fridge and watching people's faces light up when they see those soft, blushing colors.
Ask About This Recipe
- → How do I achieve the ombre effect in the layers?
Divide the batter into three portions and tint each with pink, yellow, or leave plain. Baking these colored layers separately creates the gradient effect when stacked and frosted.
- → What type of food coloring works best for vibrant layers?
Gel food coloring provides rich, vibrant hues without thinning the batter, ideal for achieving bright pastel tones.
- → Can I prepare the layers ahead of time?
Yes, bake and cool the layers fully, then wrap them well and refrigerate up to 2 days before assembly.
- → How should the buttercream be tinted for the ombre look?
Divide the frosting into three bowls, tint each with matching pastel colors, then apply carefully to create a smooth color gradient around the cake.
- → What are good decoration options for the cake?
Pastel sprinkles, edible flowers, or light dustings of powdered sugar complement the spring theme elegantly.